*originally posted to Real Simple

Last week on 30 Rock, Alec Baldwin’s character, Jack Donaghy, explains how he’s been exercising something called the Shower Principle, a term that scientists use to describe how the brain generates ideas best when distracted from the task or issue at hand.

As a writer, I’m a big fan of the SP, as I’ll call it…although I confess that I use it to procrastinate as often as I use it for inspiration. For me, however, it’s not showering that loosens the cobwebs, nor do I do my best thinking when I’m in bed. (I think I fall asleep too fast!)

Here are my top two spots for brainstorming, idea generation, and ousting writer’s block:

1. The 2/3 subway train. We’re moving to our new apartment in Brooklyn soon, and have been doing some renovations. This means many, many trips back and forth from our current home on the Upper West Side to the new place, near Prospect Park, so we can check in, oversee, harass and troubleshoot. That’s about 40 minutes each way—to sit and stew, brew and chew over things. The rumble and roll of the subway car sometimes nearly lulls me to sleep, but it can also induce a bit of a productive reverie.

2. Running. There’s nothing like the thwack, thwack, thwack, thwack of your feet hitting the pavement to help loosen the cobwebs. Only problem: I’ve written many, many an intro paragraph or witty kicker on a jog, only to promptly forget it a mere minute or two after I stop running.

Where do you find inspiration strikes you the most?

Enhanced by Zemanta

We found this article via Live in the Now and just knew we had to share it with you. Read on to find out which plant is best to keep in your bathroom to ward off mold.

1. Bamboo Palm: According to NASA, it removes formaldehyde and is also said to act as a natural humidifier.

2. Snake Plant: Found by NASA to absorb nitrogen oxides and formaldehyde.

3. Areca Palm: One of the best air purifying plants for general air cleanliness.

4. Spider Plant: Great indoor plant for removing carbon monoxide and other toxins or impurities. Spider plants are one of three plants NASA deems best at removing formaldehyde from the air.

5. Peace Lily: Peace lilies could be called the “clean-all.” They’re often placed in bathrooms or laundry rooms because they’re known for removing mold spores. Also know to remove formaldehyde and trichloroethylene.

6. Gerbera Daisy: Not only do these gorgeous flowers remove benzene from the air, they’re known to improve sleep by absorbing carbon dioxide and giving off more oxygen over night.

Written by 

For all you bathroom lovers out there, if you’ve never caught an episode of the DIY Network‘s Bath Crashers then you are in for a real treat now that it’s on your radar.

Just like DIY shows House Crashers and Yard Crashers, host Matt Muenster ambushes homeowners while they’re home improvement shopping. He uses his expertise to identify the ultimate bathroom challenge, and follows the lucky homeowner home and totally overhauls a bathroom in need of repair. It’s super cool.

The show has seen some phenomenal bathroom transformations and recently, the DIY Network’s website put together a smashing slideshow of the most amazing tubs and showers to grace the camera’s lens.

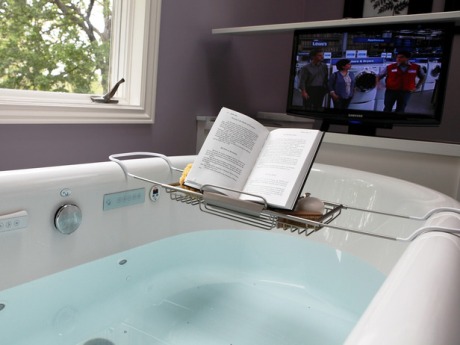
This is by far one of the coolest/handiest things we’ve ever seen done to a tub. Cleanest reading and TV viewing you could ask for!

There are plenty of other awesome ideas if you just follow this link right here:

Amazing Tubs and Showers Seen On Bath Crashers

photo originally from DIY Network.com

Enhanced by Zemanta

Everyone has a beauty ritual for their skin. Here are the beauty basics to keep your skin feeling fresh and healthy outside of the shower.

Cleansing Routine. Wash, tone, moisturize and repeat. Everyone’s skin is different some oily, some dry so find products that work for you and stick with them. Washing your face is a great way to start and end the day.

Sleep.  Sleep is probably the easiest and best thing you can do for your skin. By depriving yourself of sleep you are depriving your skin. So catch some zzzs and sweet dreams.

Water. While we are big fans of conserving this stuff your body needs it to flush out toxins and impurities. It helps keep your skin moisturized. Doctors aren’t joking when they recommend you drink 12 eight ounce glasses of water daily. Trust us you will enjoy drinking water as much as you do washing with it.

Exfoliation. So many scrubs to choose from and so little time. Exfoliation removes the old dead skin cells from the surface and leaves your skin soft, smooth and ready to be touched. Products like the Clarisonic can help you exfoliate the delicate skin on your face without damaging it.

Moisturize. Want wrinkles? Then you better lotion up! Don’t underestimate this classic beauty regiment. Using lotion along with other moisturizing products holds moisture to the skin and will help your skin to maintain elasticity not to mention battling redness and flaking.

The summer heat wave and lack of rainfall doesn’t need to stop you from conserving water. Sure, you want lush green plants in and around your house, but the amount of water it takes to keep them fresh and healthy can be a strain on resources.

We’ve got a few easy tips on how to reuse water from inside your home and safely use it to water your plants. They’re pretty painless to apply to your lifestyle. Plus, you get the benefit of getting a shower AND nice plants. Win/win.

  1. Reuse the water you drain from foods like pasta, veggies, and wash fruit with. Next time you make that coveted mac n cheese, empty the excess water into a bucket or watering jug that you can easily take and hit a few plants outside with.
  2. Shower water! The water before you jump in or before it heats up is perfect to gather up while you’re preparing for the shower or hanging around for the temperature to get where you like it. Be sure not to collect the water that contains your shampoo run off, face wash, etc. Keep it pure!
  3. BBQ leftovers. Do you have an ice chest full of melted ice water or bags of stray ice left over from camping or a summer BBQ? Don’t just pour it on the driveway- spread it around your garden and let it substitute watering that day. Beats carrying that heavy ice chest all the way from the backyard.
  4. The next time you water your hanging plants, put a bucket underneath them and let it sit for a few minutes after you finish the first one. Use that water to douse the next, and repeat. You’ll find that you have at least ½ the water you need to water all the plants just from the drip of the first one.

Image from DIYnatural.com


Enhanced by Zemanta

*Originally posted to Real Simple

By Maria Shollenbarger

Get drapes, furnishings, floors, appliances, and the rest of your home sparkling.

Drapes

Step 1: Gently tug drapes to open pleats. Using a low setting and the brush attachment, vacuum each panel. For delicate or loosely woven fabrics, hold the brush an inch away to avoid pulling.
Step 2: “Pay special attention to the lower foot of the drape and the hem, where dust and dirt accumulate,” says Sergio Finetto of the Silk Trading Company, a Los Angeles drapery maker.
Step 3: To remove smudges (the kind passing pets leave), Finetto applies baby powder to a clean toothbrush and gently brushes the spot. “The powder protects the fabric and helps lift the dirt.”

Fabric Shades

Step 1: Check the tags―if the shade is cotton, canvas, or a treated fabric, you can usually use water. If it’s linen, silk or wool it needs dry-cleaning. Vacuum the shade first, then submerge it (except for any wood or metal mounts) in a bathtub filled with several inches of cool water and two capfuls of Woolite or dishwashing liquid.
Step 2: After 5 to 10 minutes of gently agitating the shade to lift dust and grime, drain the tub and refill it with clean water. Move the shade around to rinse it.
Step 3: Blot excess water with a colorfast towel, then use a clothespin to clip the fully extended shade to the shower rod to dry. (If you have a nonwashable shade, try rubbing it gently with a dry-cleaning sponge.)

Wooden Blinds

Step 1: Vacuum or dust them thoroughly. Adjust the blinds so the slats are angled down, toward the floor. In a bucket, prepare a solution of a few capfuls of dishwashing liquid and water.
Step 2: Working one slat at a time, wash each with a damp rag. Use a dry towel to soak up excess water as you go. Flip the blind and repeat on the other side.
Step 3: To clean the cord, pull the shade all the way up so the cord is fully extended. Run the damp rag up and down it once, then follow with the dry towel.

Upholstery

Step 1: Check the care tag. If there’s a “W” on it, upholstery can be cleaned. (If not, consult a pro.) Add two capfuls of Woolite or a neutral-pH dish soap to a bucket of cool water. Dip in a sponge, wring it out well, then rub a thin layer of the solution onto each cushion, starting with the dirtiest side.
Step 2: Balance the cushions against one another or a wall to dry. Put colorfast towels or white paper towels between points where pieces touch, leaving as much surface area as possible exposed to the air.
Step 3: Clean the body of the sofa or chair, wringing the sponge out well so you’re using as little liquid as possible. To prevent mildew growth, let all the pieces air-dry completely before reassembling.

Fabric Lamp Shades

Step 1: Make sure your shade is fabric. Velvet and silk need professional care. Gently roll the shade from side to side in a bathtub filled with a few inches of lukewarm water and two capfuls of Woolite, suggests Connie Rakower of New York City’s Just Shades. Use a sponge or a rag to distribute the solution evenly over the shade.
Step 2: Run a damp cloth or a sponge over the shade inside and out to rinse off the solution, then blot gently with a colorfast towel (droplets can leave water spots).
Step 3: Set the shade on its bottom rim on a clean towel placed on a flat surface and let it dry. Reaffix it to the lamp―and see things in a new light.

Mattresses

Step 1: Wash your mattress pad in hot water every two months. (If you don’t have one, you should get one. Mattress pads, especially the antiallergenic variety, significantly inhibit mites’ proliferation.)
Step 2: Use your vacuum’s wand or upholstery attachment to carefully go over the entire surface of the mattress, paying special attention to indented or buttoned areas, where dust lodges.
Step 3: Every other time you vacuum the mattress, flip it over and rotate it so the head moves to the foot. And vacuum newly exposed sides, too. This cuts down on uneven wear and helps keep mites at bay.

Rugs

Step 1: Place the rug facedown on an old (clean) sheet and vacuum thoroughly; if your vacuum has a beater bar, flip it to the lowest setting. Turn the rug over and vacuum the top side.
Step 2: Using a sponge or a clean towel dampened with plain water, gently blot dirty areas several times. Alternate with a dry towel to keep moisture to a minimum.
Step 3: Work carefully over the damp areas with a soft, clean carpet brush to raise the pile and expose the fibers to the air. The agitation dries them and lifts any remaining dirt.

Walls

Step 1: First see Before You Clean Your Walls. Fill a bucket with lukewarm water to clean your sponge as you work. In a spray bottle, mix 20 ounces of water and a tablespoon of Woolite or dishwashing liquid, suggests Allen Rathey, president of Housekeepingchannel.com.
Step 2: Working in sections and wiping off drips as you go, spritz on the solution and let it sit for five minutes. “Use less product, but give it time to work so there’s less work for you,” says Rathey.
Step 3: Wipe each section with a clean, damp sponge. Rinse and wring out the sponge periodically so you don’t spread dirty water back onto the clean wall.

Wood Floors

Step 1: Vacuum or dry-mop wood floors at least once a week (some experts say every other day). The longer dust and dirt sit on the wax or finish, the more dulling and scratching will occur.
Step 2: When spills or scuffs appear on polyurethaned floors, use a slightly damp mop or sponge to lift them. If they’re stubborn, use a bit of the cleaner the floor manufacturer recommends to break them down.
Step 3: When the floor begins to look scratched or dull, call in the professionals to do one of two things: scuff-sand and recoat the finish, or sand and completely refinish the floor.

Cabinets

Step 1: Empty cabinets and give the interiors a thorough dusting with a microfiber or electrostatic cloth. Press it into corners, under ridges, and along door edges.
Step 2: With a solution of dish soap and warm water and a damp sponge, clean the bottoms, tops, and walls. Rinse the sponge in clean water as you go. Dry with a clean towel or rag as you work.
Step 3: Consider an idea from British TV’s Aggie MacKenzie of How Clean Is Your House?: Store muffin tins, woks, and other rarely used items in plastic bags so you won’t have to rinse dust off the next time you use them.

Microwave

Step 1: Fill a coffee mug with water and a few slices of lemon; put it in the microwave. Cook on a high setting for three minutes, suggests San Francisco Chronicle cleaning columnist Tara Aronson.
Step 2: Leave the mug inside for another three minutes. The steam will soften food spills, and the hot lemon will give that lingering pasta-sauce odor the boot.
Step 3: Take out the mug. Wipe down the walls with warm, soapy water to remove residue and food. Rinse and dry with a clean cloth.

Coffeemaker

Step 1: Empty and clean the filter. Pour three cups of water and the same amount of white vinegar into the water chamber, then switch on the brew cycle.
Step 2: Halfway through the cycle, turn the machine off and let the solution sit for an hour. Switch the coffeemaker back on to complete the cycle.
Step 3: Run at least one cycle of clear water (two to be on the safe side) through the machine to rinse out any residual vinegar.

Refrigerator

Step 1: Unplug it or turn it off before cleaning. Remove all the shelves and drawers; they get their own wash-down. Add two tablespoons of baking soda or dish soap to a quart of warm water and wash all inside surfaces. Rinse them with clear water and dry with a clean cloth.
Step 2: Wash the drawers and shelves in the sink with warm water and dish soap, then wipe dry. Use the same solution to clean the door gasket (the rubber bumper that seals the refrigerator shut).
Step 3: Add a tablespoon of dishwashing soap to a quart of water and disinfect the door handles with the solution. No need to rinse―the solution will dissipate on its own, taking germs with it.

Stovetop & Hood

Step 1: Soak a gas stove’s burner grates in warm water and dishwashing liquid for five minutes. Use a soft dish brush to scrub away cooked-on food, then rinse.
Step 2: Dry grates with a clean cloth. Be vigilant with cast iron, which can rust if it’s not completely dry when put back in place.
Step 3: Place the hood’s air filter in the bottom rack of the dishwasher; or soak it in dish soap and hot water for at least 10 minutes, then rinse and dry. Degrease the hood with hot, soapy water, then rinse.

Oven

Step 1: Remove racks (and detachable steel side supports) and soak them in the sink or the tub in dish soap and warm water. Use a soft brush or a white (low-abrasion) SOS pad to remove built-up food.
Step 2: If your oven is self-cleaning, activate the cleaning cycle. If not, apply oven cleaner, following the directions carefully.
Step 3: When the self-cleaning cycle is finished, use a soft cloth to sweep the ashes out of the oven. Make a final pass with a damp rag to get every last bit.

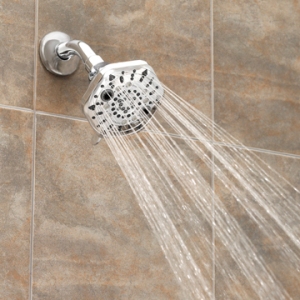
There you are, wet and soapy as you shower away the grime of the day. It’s a luxurious, purifying feeling. But just as you’re unwinding, you feel something lapping at your ankles – dirty water with a soap scum-slick across the top is pooling around your feet. Eek!

Don’t reach for industrial chemical drain cleaners that can damage your pipes and pollute our water. Try this non-toxic recipe from greenlivingideas.com to reclaim your pristine shower space:

You will need:

2 cups baking soda

4 cups boiling water

1 cup vinegar

Remove all water from the tub and pour about 1 cup of baking soda down the drain. Make sure that baking soda makes it down the drain.

Next, pour 2 cups of boiling water down the drain. The baking soda mixed with boiling water dissolves the sludge and gunk in the pipe, even if you don’t see it happening. Wait a few minutes.

Now, pour another cup baking soda down the drain then add 1 cup of white vinegar and plug the drain immediately. You’ll hear sizzling coming up from the drain and see bubbles foaming up.

When the bubbles have died down, add the remaining boiling water down the drain.

Repeat this process if necessary.

How does it work?

Baking soda is a base and when combined with vinegar, an acid, reacts to form carbon dioxide and sodium acetate. This presents as the bubbles scrubbing the drain’s insides. Remember the volcano you built in science class back in school?  Instead of rising up and out, as with the volcano, it is sent down into the drain dissolving the gunk. These natural, non-toxic ingredients get flushed farther down ensuring a clog-free drain.

A monthly treatment helps prevent future clogs and ensures eek!-free showering everyday.

Enhanced by Zemanta

As people become more health conscious, many are looking to revamp their homes with natural, eco-friendly products that boost the health of the whole family. Despite popular misconceptions, “greening” your home doesn’t have to break the bank. Experts say there are many low-cost and do-it-yourself options that will be kind to both your pocketbook and Mother Earth.  Here are a few tips we found:

Vinegar is the mother all cleaners. Did you know that you can use distilled white vinegar to make a myriad of home cleaning products? From coffee makers to wood paneling, vinegar cleans it all. Throw in a little pure castile soap and some essential lemon or grapefruit oils and you have a cleaner that rivals anything you’ll find on supermarket shelves. We found 23 different vinegar cleaning recipes at The Good Human.

Reclaim and repurpose.  Recycling is good, but it’s not great. Hard-core sustainability advocates say that if you have to recycle that container, you probably shouldn’t have bought it in the first place. Of course that’s not practical for most us who live and consume in the work-a-day world, but this kind of idea does generate creative ideas for re-purposing our purchases. For instance, buy glass jars whenever you can. You can sterilize them and use for your own canning projects or make cool candle holders that you can give as gifts for holidays and birthdays. Not only does this kind of project prevent waste from going to the landfill, but it also saves you lots of money. Savvy Housekeeping.com is full of amazing ideas for re-purposing your every day household goods. No need to stop with little items though. Think about your furniture or old clothes. Sure, you can donate them to a local charity, but consider reviving your favorite recliner with some funky new fabric.

Conserve precious resources. Want to save gas? Walk or bike to work. Consider public transportation. Maybe it’s time to downsize from that home in the suburbs to a loft in the city. Not your style? Then consider investing in a home energy makeover. You can install an Energy Hub device that helps you monitor and control your home energy use. And if you haven’t already, be sure to replace your old showerhead with an eco-friendly water saving Oxygenics model. We’ve got lots to choose from at Bed Bath and Beyond.

What savvy green tips do you have to share?

After months of anticipation, summer has finally arrived.  Long warm days spark much desk unrest as people gear up to go on vacation. For millions of proud RV owners, summer means it’s time to hit the road. As a freeway savvy vacationer, how do you stay clean and refreshed when traversing North America’s highways? As any good RV’er knows, a stellar water system is key to combating hot dusty days on the road.

A recent poll in RV Education101 newsletter revealed that 59% of RV owners use their built-in coach showers exclusively. Reader comments suggest that motor-homers love their private, mobile showers. So why aren’t more motor home owners reveling in their baths?

The biggest complaint seems to be water pressure.

“Factory motor home installed showerheads just don’t deliver the pressure I’m looking for,” says Odessa, Tex., native and RV owner Vikki Thiebaud. “But I hate using camp showers. That’s why I own my coach, so I can enjoy my privacy.”

Campgrounds are notorious for having erratic water pressure. And when you’re parked off the beaten path with only your water tank for use, the shower can be an especially tricky endeavor.

So here are some tips to maximize your fresh, clean water experience in your RV this summer:

– After sitting idle all winter, your RV water tank needs a good cleaning. Experts say you need to sanitize your system once a year. Despite popular belief, bleach does not appear to be your best bet.  USA Today Travel Tips offers some good insights into taking care of your system the cleaner, greener way.

-After you’ve sanitized, give your plumbing system a once-over. Replace old worn out hoses whose kinks are killing your pressure. Invest in a good regulator. Already have one? Check to make sure it’s working properly. Take care of your hot water heater, filtration system, and more. Lots of good tips and news can be found at the RV Daily Report.

-Upgrade your shower with an Oxygenics BodySpa showerhead, designed specifically with the RV owner in mind. No matter where you are, hooked up at a campground or floating free, the BodySpa eliminates worry about your shower being a slow trickle. The head self-pressurizes, delivering a powerful shower despite limited water tank capacity or low-pressure campground connections. Oxygenics powerful oxygenating spray allows you to rinse clean in a shorter amount of time for a quick, efficient shower. It’s also super easy to install. Camping World offers three models to best compliment your RV needs.

Now you’re ready for a summer of road trips. Happy trails!


When getting clean we like to keep it simple yet luxurious. Using products that are organic and good for you can leave you fresh clean while natural and chemical free. Here are some products we found to get you started!

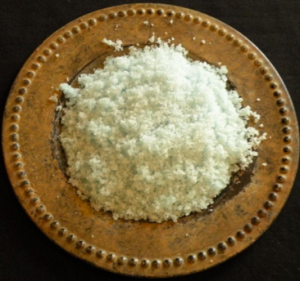
Natural sea salts and oils are a great way to scrub down and moisturize naturally.

From Morrocan oil to teatree mint, these shampoos and conditioners from Organixhair.com will induldge your tresses and senses.

The founder of these fabulous soaps from Cactus & Ivy left her Fortune 500 job to pursue her passion for organic products.

Forget those frou frou pastel colored loofahs keep it simple with an organic loofah like this one by Organix.

Pangea Organics believes that your skin is only as good as what you put on it. Bathe in the best and be kind to your body with these products containing herbs, vitamins, minerals and essential oils.

After you have lathered up with all of these organic natural products it would only make sense to wrap up in a towel made from organic cotton or bamboo.